|
|
 |
| |
The Furniture
I am designing and building all the furniture myself, using mostly flat cardboard, balsa wood, and some minis from my collection (mostly Games Workshop WHFB bits).
Below are pics of the things I've finished so far. Each piece will have a front and back finished pic acompanied by a a pic from somewhere in the building process to show how I made it.
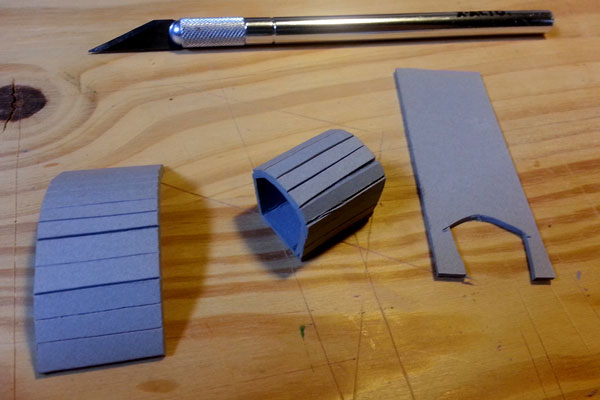
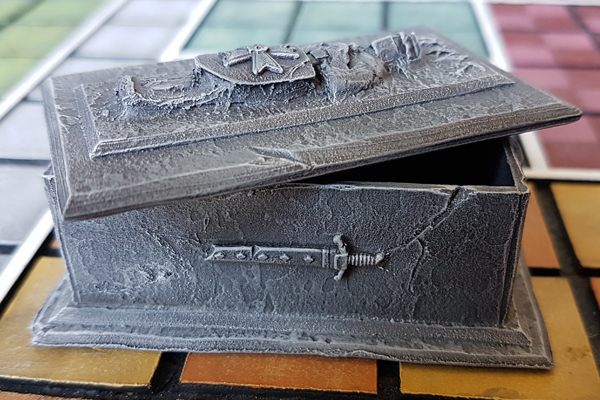
Treasure Chests

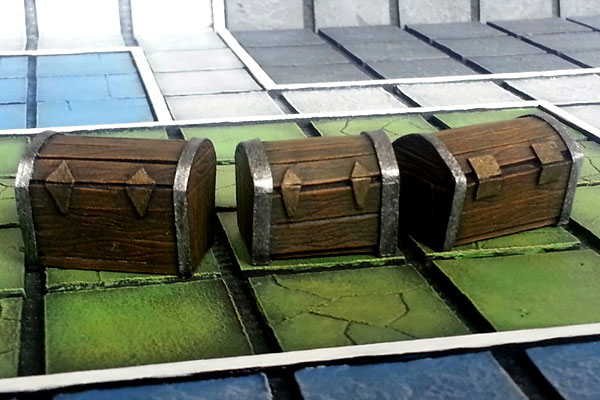
Cardboard cut and folded to shape, glued on the ends, then cut and glued cereal box cardboard for the metal details. The wood grain is just scored on using a pointed file (you'll see much more of this technique when I post the tables).
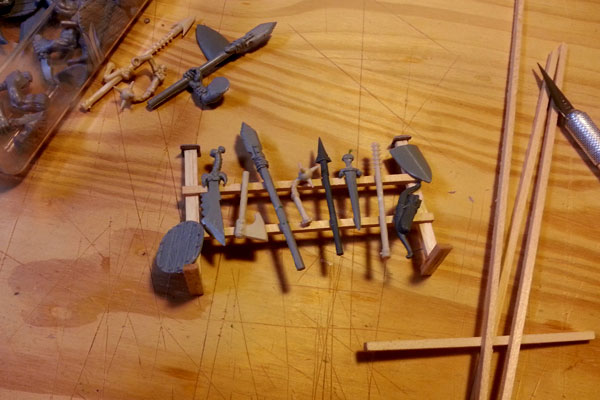
Weapons Rack
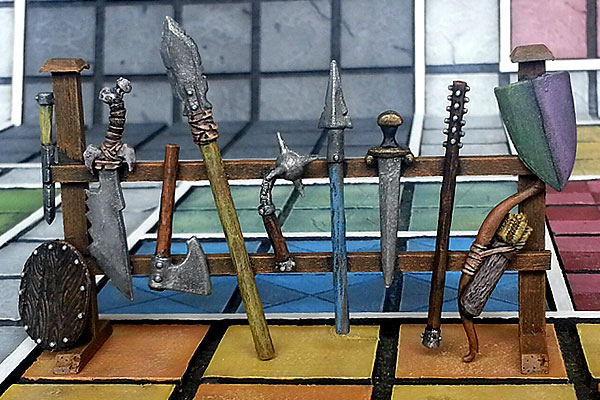
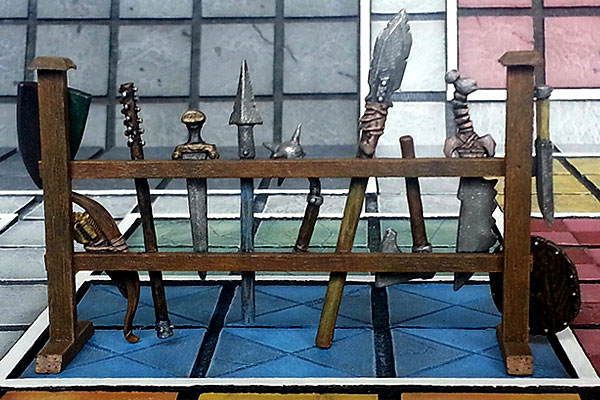
The frame is all balsa wood (squared dowels), which is easy to cut to shape, and the weapons are all GW bits, most just needed to have a skeleton or orc hand cut off.
Tables
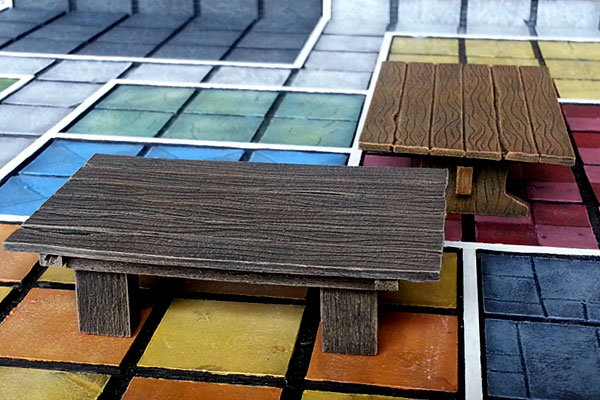
Cardboard and balsa wood. Much more of the wood grain technique here. Just used a file to score lines into the cardboard. A wash and a drybrush helps bring out the lines.
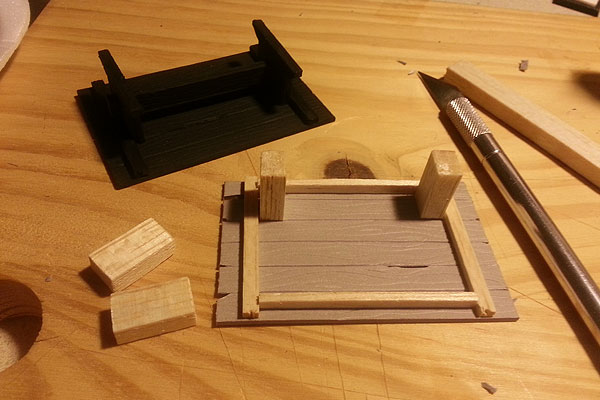
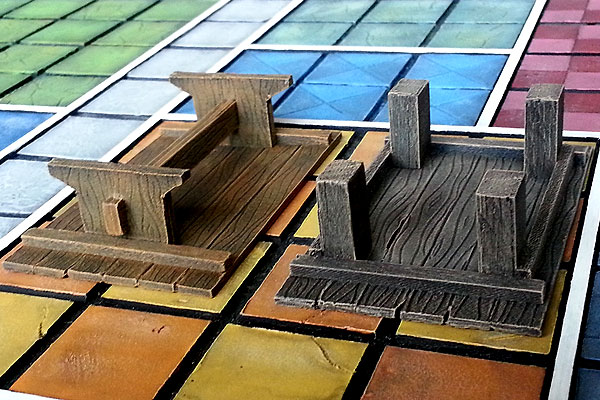
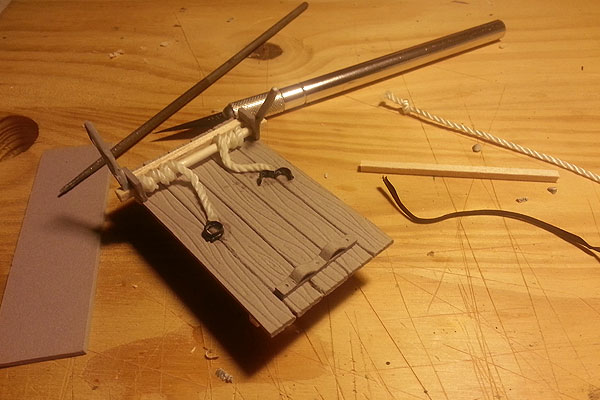
Torture Rack
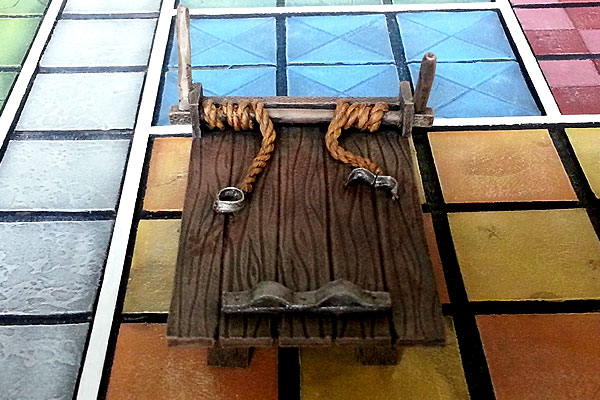
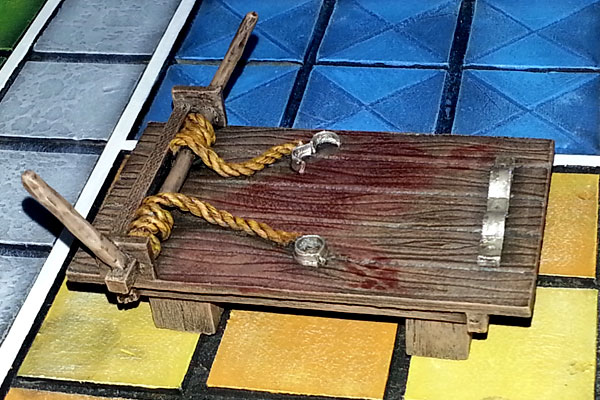
Similar to the tables, with some string and pieces of twist ties added. The metal ankle restraint is just ceral box card scored and folded.
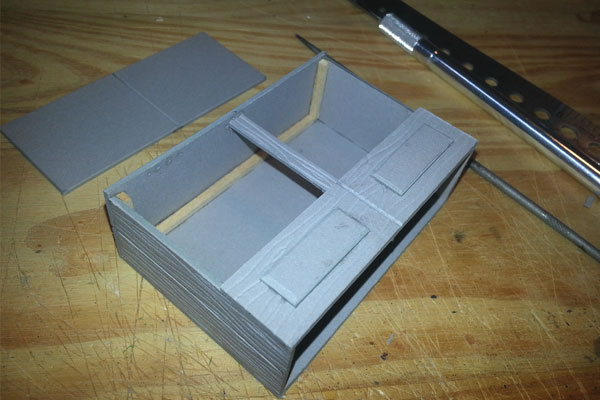
Cupboard
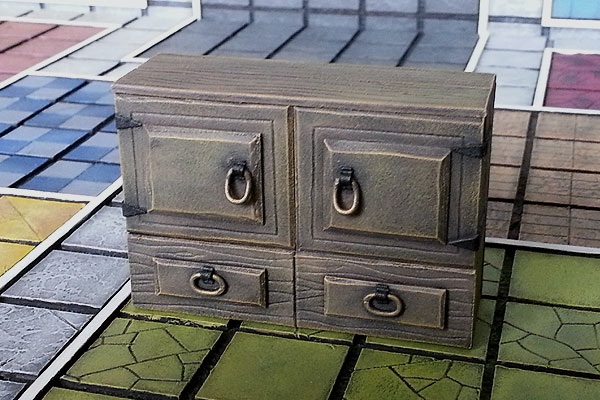
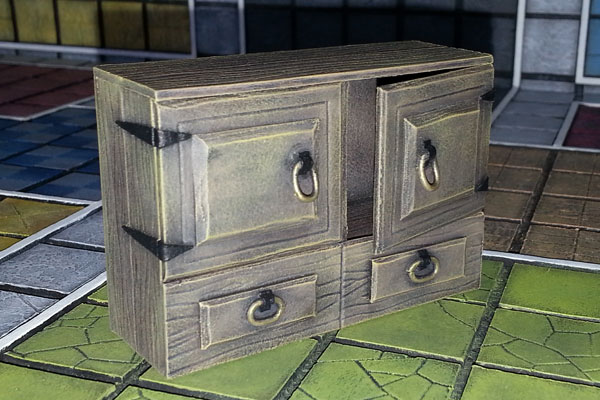
Even more of the wood grain scoring technique (might as well be consistent), metal handles are links from a chain necklace. Black iron details are just thin cardboard cut and shaped. No, the cupboard doors do not actually swing open and closed, but they do come off entirely, and they fit pretty snug so I can place them in an open position and they hold.
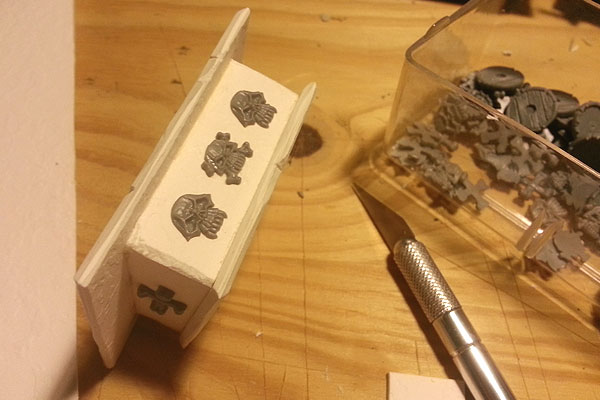
Sorcerer's Table
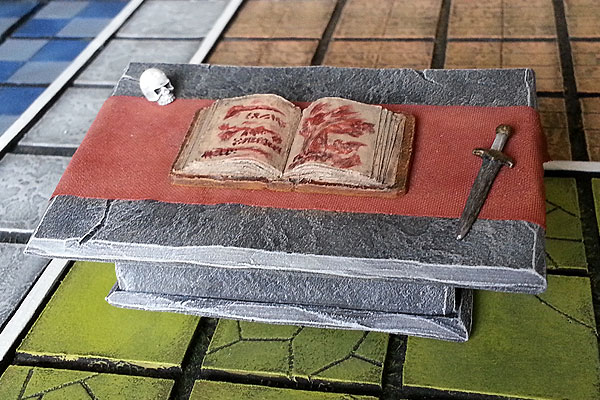
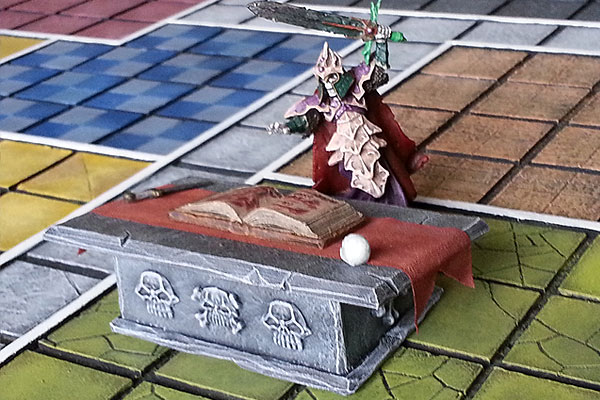
Stone effect is the same textured cardboard I used to make the corridor tiles on my board. The skulls and bones on the sides are just shield bits from older GW Skeletons, and the draped cloth is a simple piece of ribbon cut, painted, and glued. I made the book from thin cardboard and lots of tiny pieces of paper cut from an advertising flyer (it's really thin), then handpainted the stuff on the pages (some of you may recognize those pages, which are bound in human flesh and inked in blood).
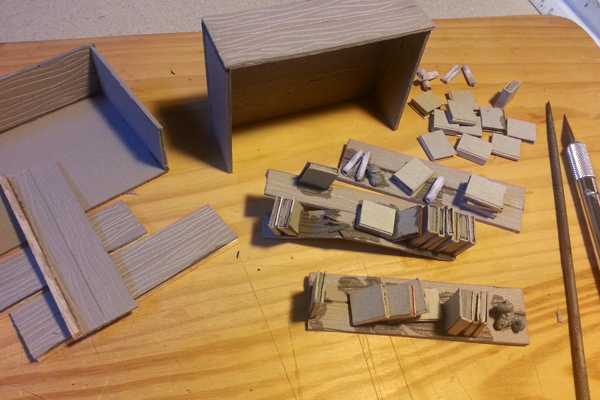
Bookcases
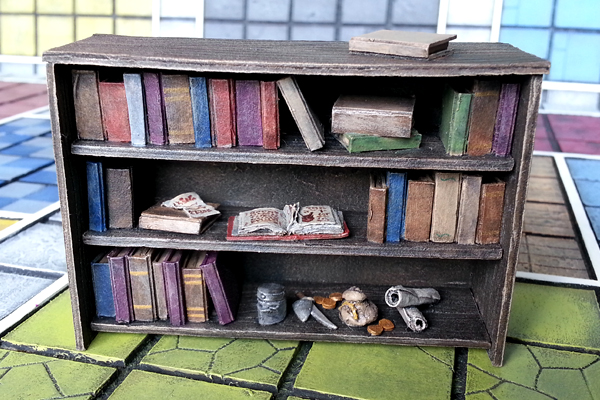
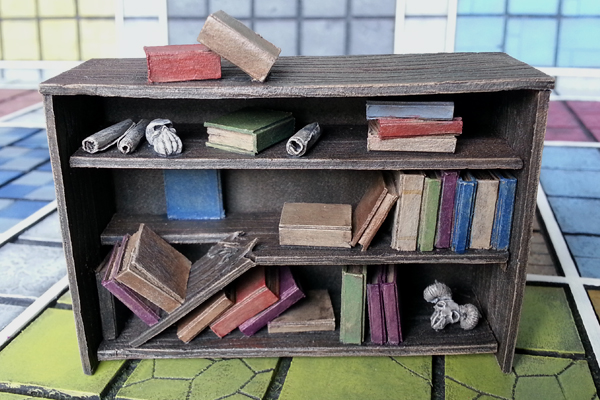
I put a lot into these two pieces, and the shelves are removeable (and swappable, I suppose, if I want to change the positioning of them), so I can show the detail:
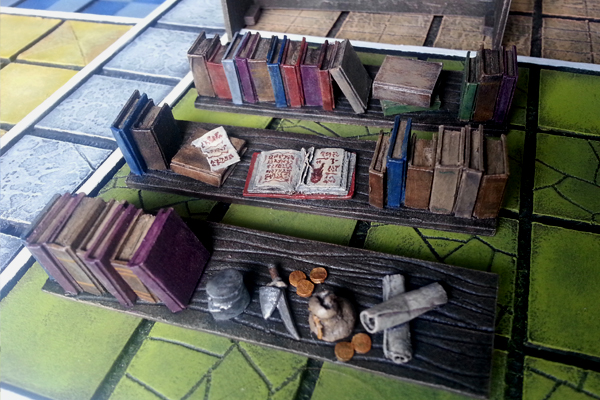
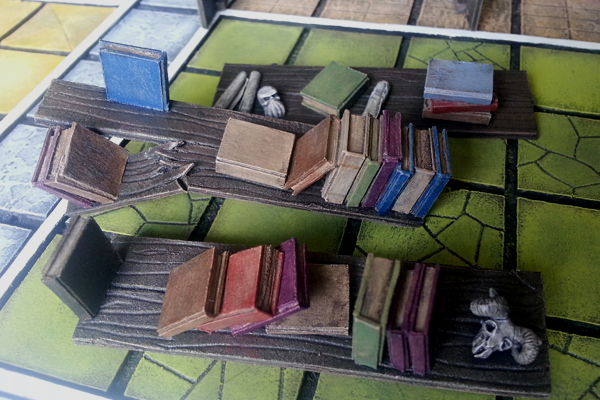
The cases themselves are the same old scoring on cardboard, and the stuff of the shelves was tedious and time consuming, but a whole lot of fun to make! The books are thin carboard wrapped around thick cardboard. The scrolls are just rolled up paper covered in instant glue. The skulls, helmet, and dagger are just GW bits. And the coin bag is, believe it or not, sticky tack I shaped, then covered in glue, with slices of a plastic GW spear bit as coins. The open book (and torn out page) on the first bookcase is more thin flyer paper, with some handpainted ancient burial rights and demon ressurection passages.
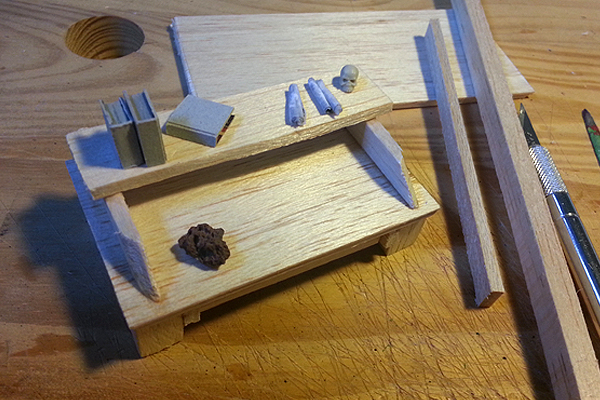
Alchemist's Bench
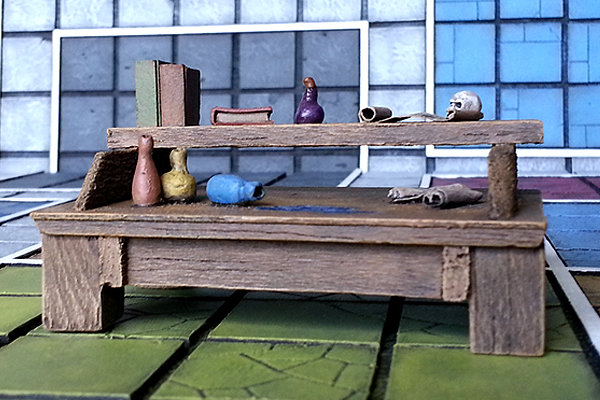
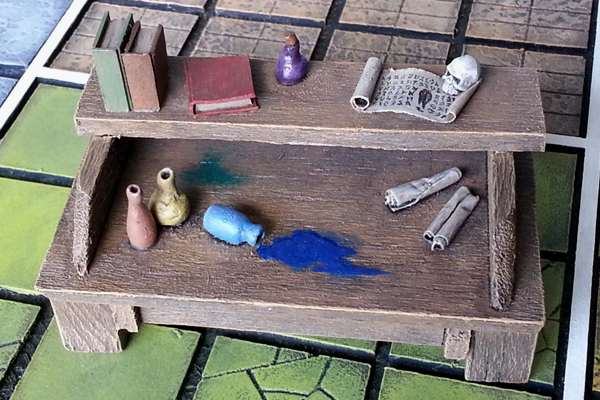
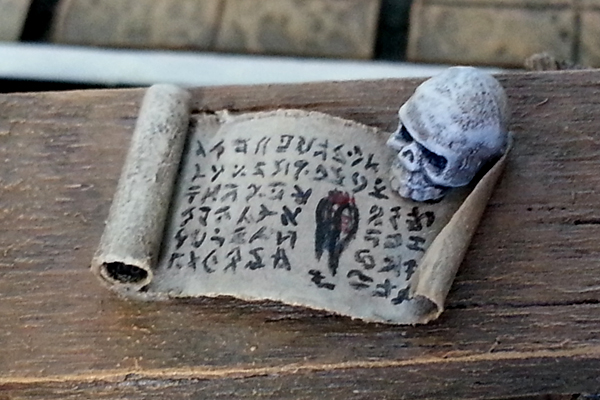
For this one I took a break from the cardboard scoring in favor of straight up balsa wood. I figured most alchemists would want a bit of a sturdier work area, and so would have their bench constructed out of solid planks of wood with a little more care and precision. The bottles are just more sticky tack covered in glue. The open scroll is hand painted with a very tiny brush. I've added a close up photo because I am quite proud of how much tiny detail I crammed onto that scroll. The drawing on the scroll is supposed to be some sort of plant root that is part of a potion recipe. Hopefully that came accross as I intended. I ended up not using the rock in the picture below, it just didn't quite fit right after I did the bottles.
Throne
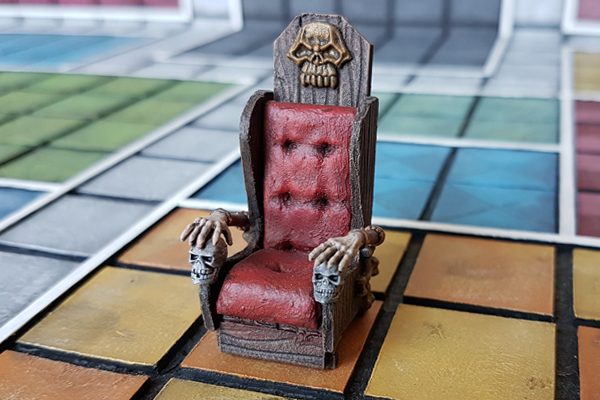
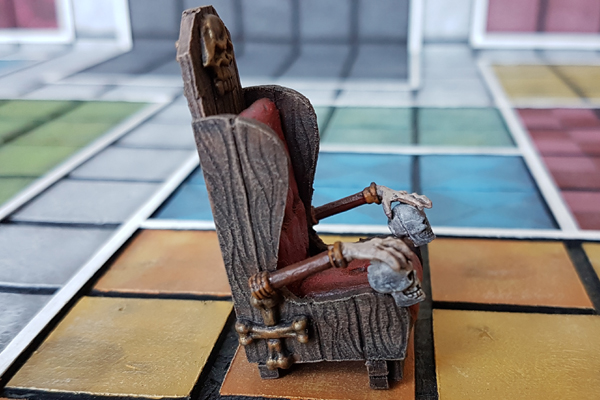
I got a little eccentric with this one. The chair base is just more scored cardboard, and the emblems are just GW skeleton shield bits. The cushion was made with a moldable clay which I shaped, then pressed a thin mesh facbric against to give it texture while creating the button indentations. The arms are the eccentric part. Those are from the GW zombie standard bearer, and I thought they would look pretty cool holding the skulls. Unfortunately, I lost the photo for this piece in progress when I purchased a new phone, so no "making of" shot.
Fireplace
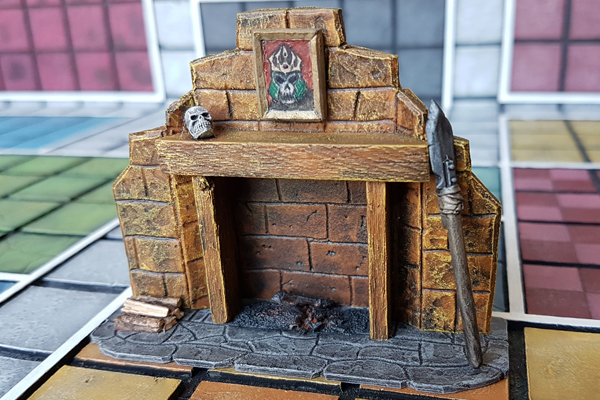
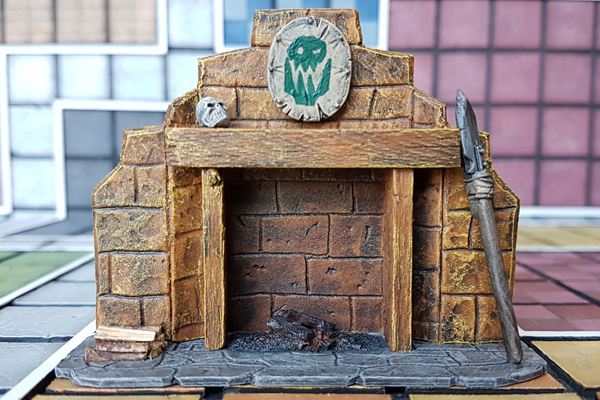
Textured cardboard cut, scored, and bent, with some balsa wood trim for the mantle. The stack of wood (and the burnt wood too) is an actual cut up twig. The photo above the mantle I hand-painted, and it is suppose to resemble the mini I am using as the Witch Lord. I didn't want that painting hanging above every single fireplace the Heroes encounter, so I glued in a little magnet on the fireplace and made the generic orc shield swappable with the painting. I may make other things to swap out in the future (like big sword or somehting). This piece also fell to the new phone plague and has no "making of" pic.
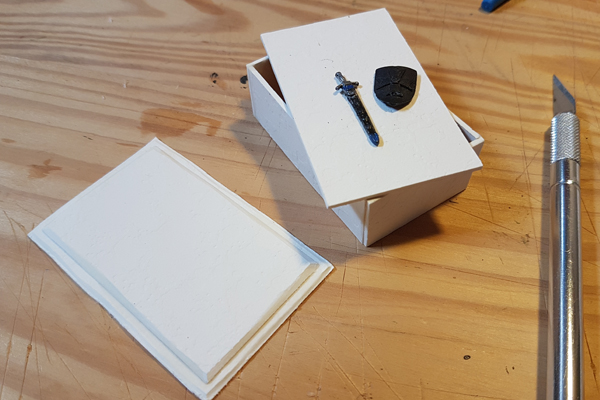
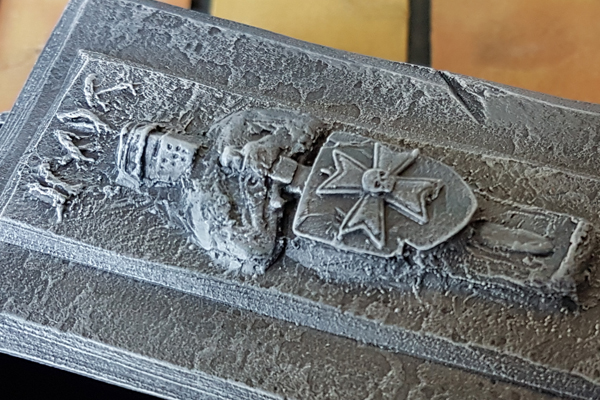
Tomb

The final piece of furniture from the base set. I left this one to last because I had no idea what I was going to do for the lid. I considered finding a mini I could slice the back off of, doing the whole lid with white glue and toilet paper, or just sticking some bits on the top and forgoing the little dead guy carving altogether. In the end, I used a mix of bits and the same moldable clay I used on the throne. I was pleasantly surprised with how well the clay resembled carved stone as I shaped it on the lid. The tomb itself is more textrured cardboard with shield and sword bits glued on. Of course I made the lid removeable, but have yet to put anything inside the tomb. I'll likely throw a skeleton in there for the heroes to find. Luckily I started this piece after I received my new phone, and I've included a close up of the lid for good measure.
Possible Expansion Furniture to Come...
|
|
|
|
 |
HeroQuest Homebrew: Showdown 35. Design by David Fenner.
| Milton Bradley
Free web hosting provided by 000webhost.com
|
|